


Hi again Everyone! After everyone’s illnesses these past weeks, I’ve finally been in the craft room a lot this week. (I’m just ignoring the big Golden Retriever hair balls tumbling in the corners!) I’ve got real creative work to do!
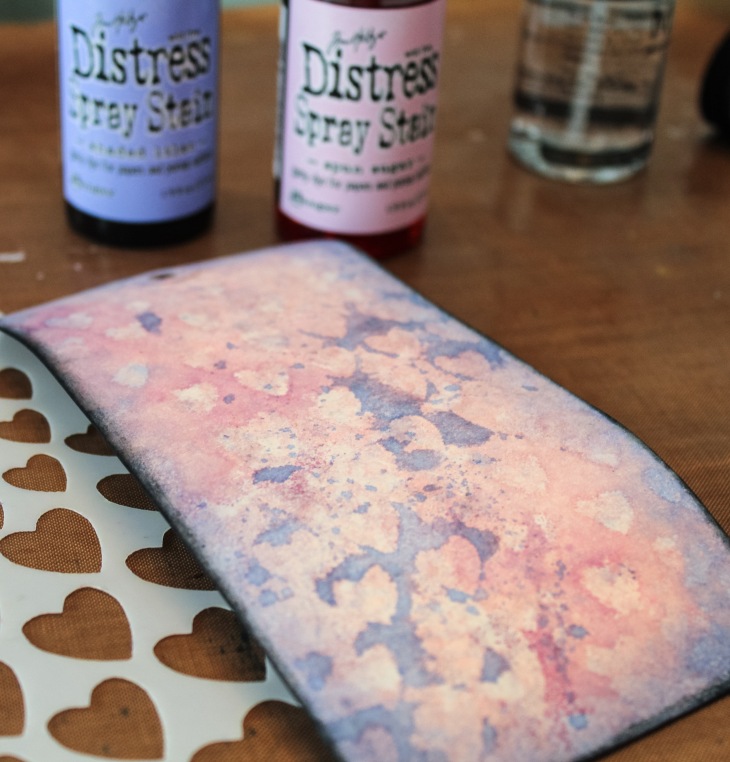
I spent much of the past two days working on this tag for both Tim Holtz’ 12 Tags of 2016, February and Simon Says Stamp Monday Challenge, Spritz and Spray. I love the colors of pink, lavender, and gray on this! I didn’t want to do the traditional Valentine’s red, and so I began with Spun Sugar and Shaded Lilac Distress Spray Stains on the tag. I dried this, dribbled water, and blotted with a paper towel. Next I used the first technique remix of mono printing by rubbing the same colors of distress ink onto a TH heart stencil, sprayed with water, and smoothed the stencil onto the tag. Before lifting, I used a paper towel to blot any excess. This is a process that I should have tried several times to perfect the amount of water, but I’m too impatient. LOL! Story of my crafting life! Finally I used Hickory Smoke DI around the sides and a little Black Soot on the edge.
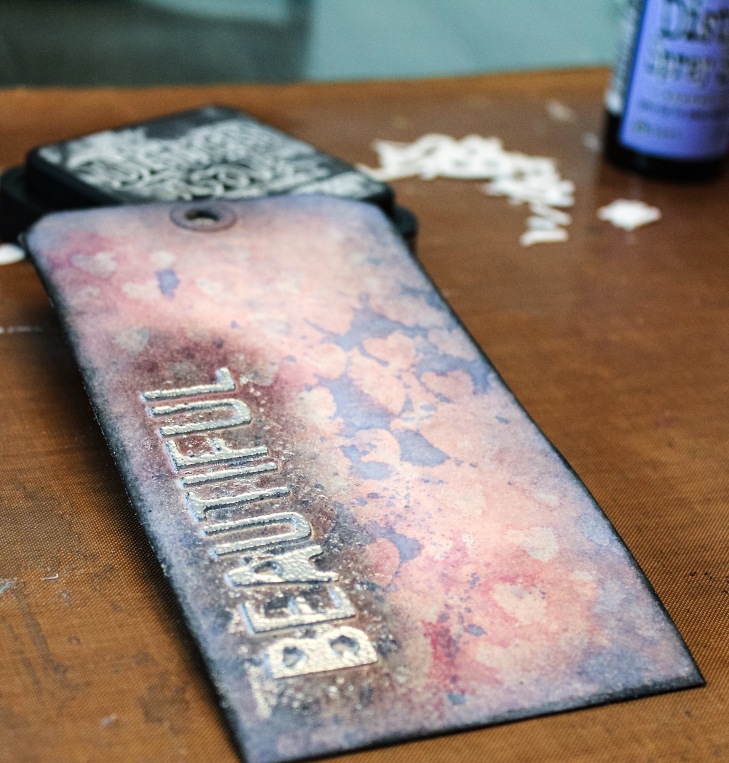
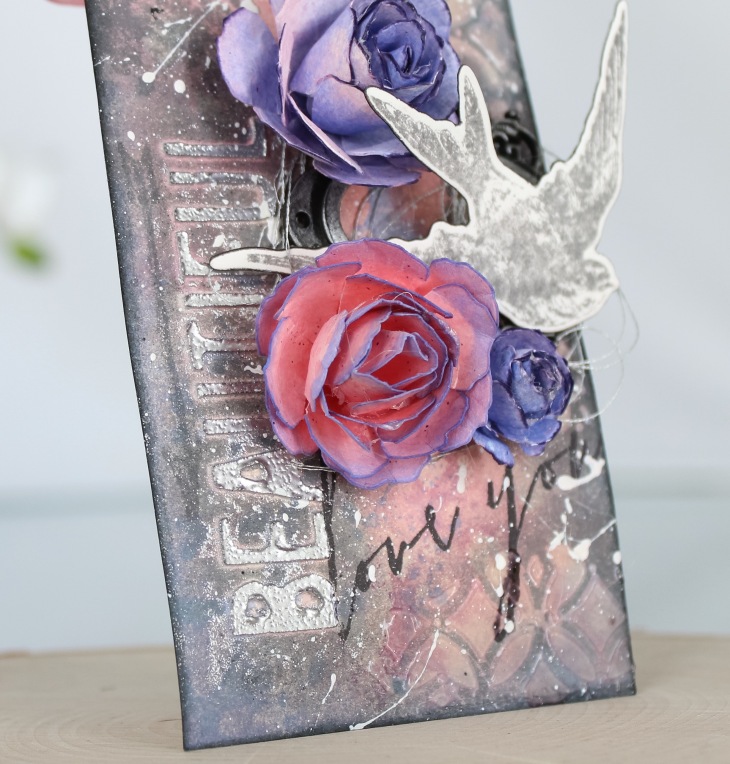
The second technique remix was next. After completely drying the tag, I used the TH Thinlits die from the Adventure set to create a “beautiful” word stencil from watercolor paper, and then I used this with Ranger Opaque Matte Texture Paste. After removing the stencil, I covered the sentiment with silver Ranger Embossing Powder.
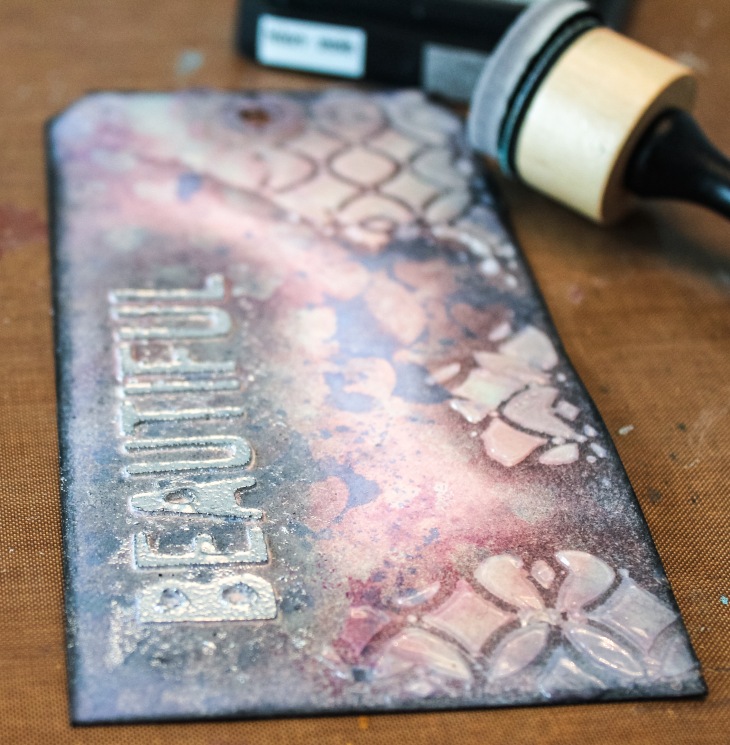
Next, I used a TH Thinlits die as a stencil with Ranger Transparent Gloss Texture Paste to balance the heavy dimension of the “Beautiful” sentiment on the left of the tag. After everything dried overnight, I heat-set the embossed sentiment, and then covered all of the texture paste with a blender and Hickory Smoke DI. I think this is my favorite part of the whole tag! The soft gray ink softened everything and makes all the dimension pop. Also, did you notice that the opaque matte texture paste maintains very sharp, clean edges, and the transparent gloss rounds out the edges as it dries? Matte paste will absorb color and the gloss resists. For more on the differences watch some Tim videos here from ScrapTime. Now that I’ve learned these unique properties, it really helps in decision-making!

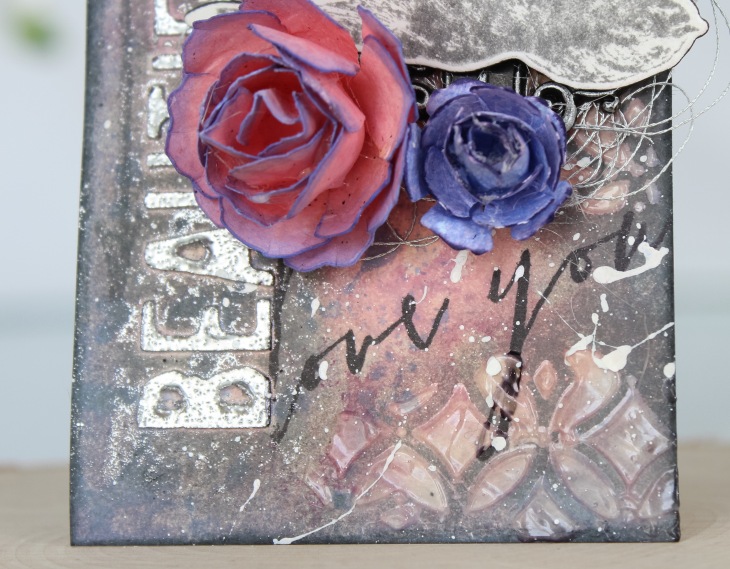
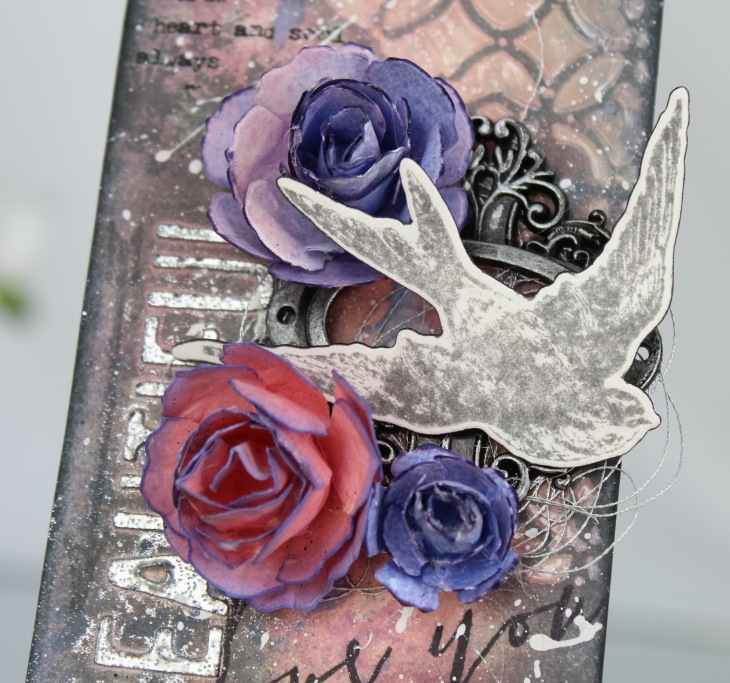
The small, typed sentiments are TH Remnant Rubs, Words. The “Love you” sentiment was stamped with black Archival Ink, and the other two stamped images are from the same Love You TH Framelits set stamped in Hickory Smoke DI.
Of course, the next step was to splatter Pickett Fence Distress Paint onto the tag, because it wouldn’t be mixed media for me without the usual splatters! LOL! Next I used Dina Wakely paints in black and silver to age the TH metal frame. Then I used silver floss behind the frame and adhered it all with a hot glue gun. (Can I just say that I’ve rediscovered my hot glue gun after a very long hiatus!)


I created flowers for the first time with the TH Tattered Florals dies. This took a while (and remember how I am about patience), but it was so worth the work! First I sprayed and/or inked 90 lb. watercolor paper. Then I folded it and die cut at least four or five of each the medium and small flowers. Before forming into flowers, I used a blender and DI to edge the petals. Here is a link to crafty papering ‘s video that I watched on how to create these flowers. Her’s are gorgeous! Please watch her video for the instructions.

Finally, I stamped the sparrow with Hickory Smoke DI onto TH watercolor paper, die cut it, and outlined it with a Black Soot Distress Marker. I hot-glued the flowers and bird into place so that everything would stay exactly where I wanted them. The final step was to spray TH Crinkle Ribbon with Spun Sugar DSS, dry with a heat gun, and tie onto the tag.

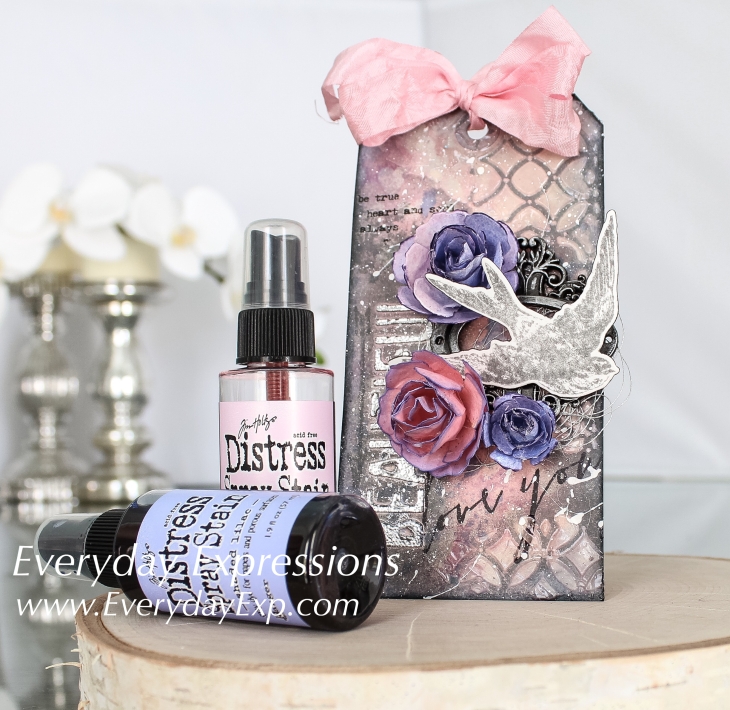
There you have it! My February Tim Holtz tag. Seriously, could I have found one more Tim product to squeeze onto this? Well…probably. But we have to stop somewhere. Right? What do you think? Thanks everyone for stopping by! Love and distressed hugs!
Erin

What a beautiful tag! I love the colors and techniques you used for your background. Amazing!! Thanks for entering it in the Simon Says Stamp Monday Challenge.
LikeLike
Your tag is just gorgeous! Love the color combo and all the details.What a beautiful take on Tim’s tag!!!
LikeLike
This tag is lovely! The colour combination is gorgeous and I love the background you created. Thank you so much for sharing with us at the Simon Says Stamp Monday Challenge Blog!! Happy Valentine’s Day!
LikeLike
Gorgeous! I absolutely adore that colour combination and your texture is lovely!
LikeLike
What a winning combination of colors and your assemblage of bird, flowers and frame is lovely. Nicely done!
LikeLike
Thank you so much for describing how you made this masterful tag. It is so beautiful with lovely details. Thank you.
LikeLike
Thank you so much for your kind words! Hopefully soon I will be adding videos for my projects.
LikeLike
what a soft and beautiful tag! congrats on your win!
LikeLike
Congratulations, a lovely feminine take on Tim’s tag and soon pretty. Well done. Hugs C.xx
LikeLike
Congratulations! Love the colors you used & the flowers!
LikeLike
Truly beautiful..I am inspired!
LikeLike
This tag is so beautiful!! I love the flowers and the colors.
LikeLike
This tag is beautiful! I love the colors and the flowers are beautiful!
LikeLike
What a beautiful tag – just love everything about it. Congrats on your win!!
LikeLike
Congratulation! Wonderful Tag! Hugs. Maria 😉
LikeLike
Tag came out gorgeous! Congrats on your win. will have to look for your March tag. Creative Blessings! Kel
LikeLike