Hi Everyone, and welcome back! Today I have the easiest, but prettiest WOW effect technique for you! I created this card as homework for Altenew Academy’s Celebration: Stencil Techniques class taught by Laurel Beard. The lesson featured texture paste with stencils (and I LOVE texture paste! You can see other creations I’ve made HERE, and HERE, and HERE.), but for this I used Tonic Nuvo Glimmer Paste for the first time. Oh…My…Goodness! It creates a soft, opalescent glimmer on your cards! I’m sure you’ll be seeing it a lot in future projects.
Technique:
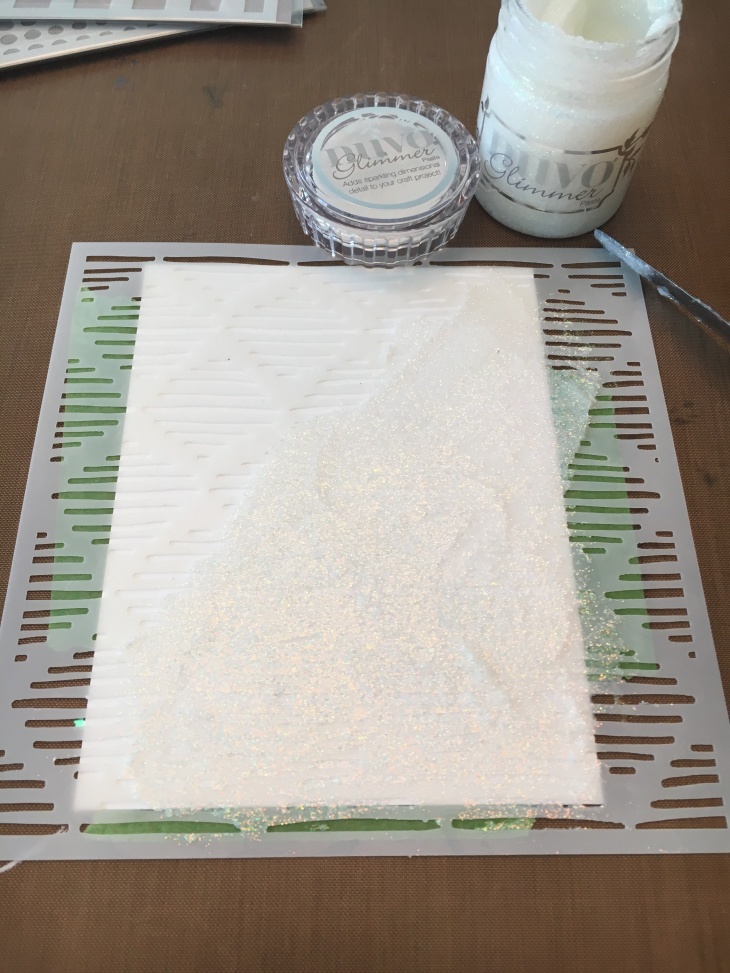
(This is really a tip, but I will say it here as well), tape your cardstock or watercolor paper onto the back of the stencil. When you flip it over, you can cover the entire panel with paste and tape won’t cover any of it.
Sketched Lines stencil with Nuvo Moonstone Glimmer Paste
Spread the paste over the stencil and cardstock with a palette knife. I like to leave it thicker and uneven, and I usually don’t cover the entire panel. Interest and dimension are the goal!
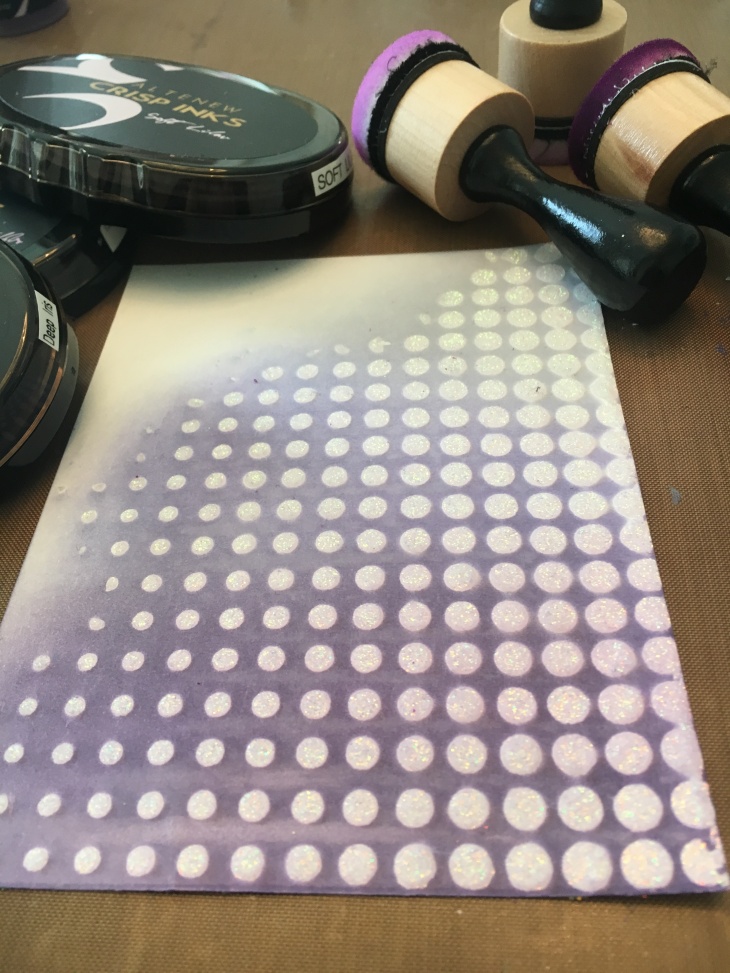
Halftone stencil
Gently peel off the stencil and wash both the stencil and palette knife with warm water immediately. Set the cardstock aside to dry.
When the paste is completely dry, you can blend dye ink over the texture. Here I blended purple inks in an ombré effect. Finally, I lightly misted Lilac Fields Shimmer Spray over the ink and paste. Soooooo pretty!
Tips:
Tape your card panel to the back of the stencil. If you use painter’s tape, remove some of the stickiness by putting it on your arm or pants a couple of times first. If not, it will tear the paper when you remove it.
You can use spray inks, watercolors, blended dye ink (as I did here), or even Distress Crayons over the dried texture paste. HERE is a card I created with texture paste and Distress Crayons. If you use Distress Crayons, it helps to paint a layer of gesso over the dried texture paste before using the crayons. It helps ‘float’ the color over the panel.
Make the panel look finished and professional by blending ink along the panel edges. Do you see this in the picture above? Try it! You will see what I mean.
Thank You die layered over vellum and fun foam. Die cut from black cardstock with two layers of heat set clear embossing powder.
Lightly mist with shimmer inks for even more sparkly loveliness:)- Can you see it in the picture above?
Trick:
Glimmer Paste! This is the first time I’ve used it, and I am so happy with the effect. Texture paste is great, but this is amazing! Try it and let me know if you agree! It would gorgeous for snow flakes, added dimension as snow… The possibilities are endless!
Thanks again for stopping by! Love and artsy hugs!
I'm a wife, mom, and former teacher. I decided to create a blog and share some of the ways I express myself everyday. You'll usually find my latest card creations, but I plan to throw in some projects from around the house as well. Maybe I'll even post a recipe once in a while. You never know what you're going to get!
View all posts by erint2015
4 thoughts on “Nuvo Glimmer Paste”
Beautiful card. Thanks for sharing your very helpful hints and how you put it together step by helpful step.


Beautiful card. Thanks for sharing your very helpful hints and how you put it together step by helpful step.
LikeLike
Thank you so much! What do you think of the new format?
LikeLike
Fabulous write-up, Erin!! Love the embossing paste with glitter! Your use of stencil is awesome!
LikeLike
Thank you so much Virginia!
LikeLike