Hi Crafty Friends! Today I’m sharing all of the details from the Altenew Workshop I held last week to earn my Educator Certification. Can you believe that I was admitted into the program in the very first group of applicants? It’s been a long two year journey, but I finally completed everything required: 25 Altenew Academy classes, 30+ cards/projects, one video tutorial, and one workshop.
I’ve learned some new techniques (Zentangle – thank you from the bottom of my heart Amber Rain Davis!), and improved many others. My hope is that I inspire others to apply and stick with it to the end. I’m so happy that I did!
My primary goal in teaching this workshop was to show everyone that it’s okay to make mistakes as this is a handmade card, and artwork is never perfect. The number one worry I hear many crafters express about layered stamps is that it is difficult to align each layer, and it is stressful (even with a stamping platform). So for the first card I wanted to keep it stress-free, and we stamped with a stamping block – no platform. The point of the lesson; relax and let it go!

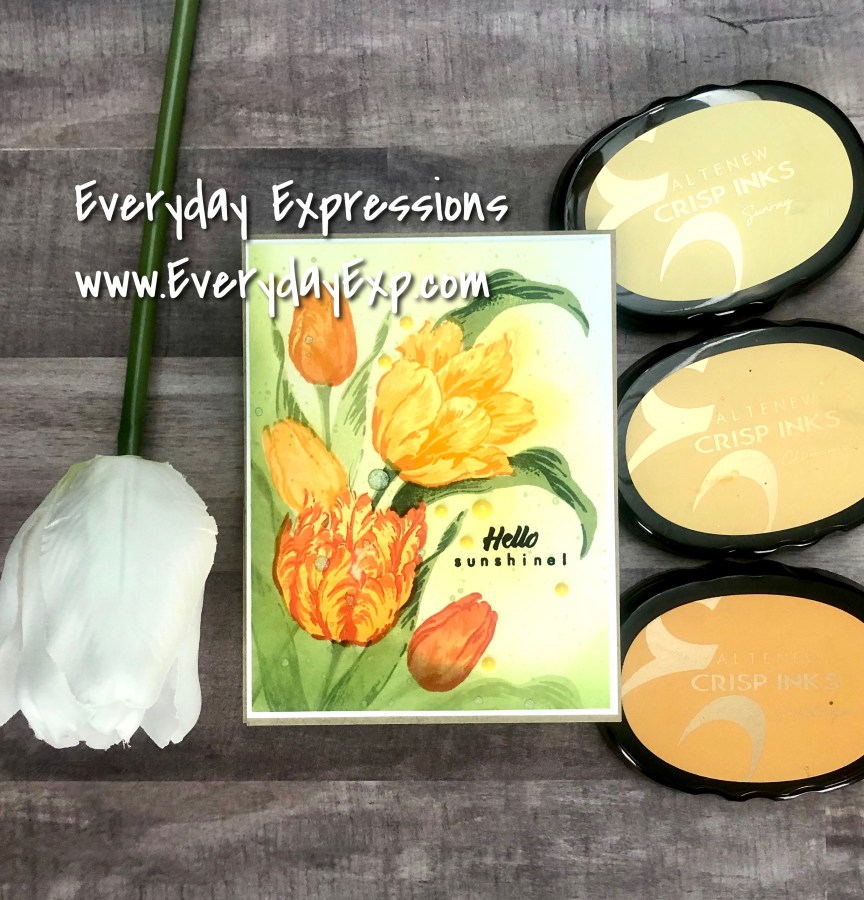
Card #1 Technique:
We only stamped two layers of the flower and leaves using an acrylic block on a slimline card; the solid and the detailed outer layer with four Altenew inks. (The Altenew ink sets make color choice so simple!) We also used the coordinating set masks where needed, and then softly blended ink around the edges. I think everyone agreed that some of the misaligned stamping added to the artistic look of the card.

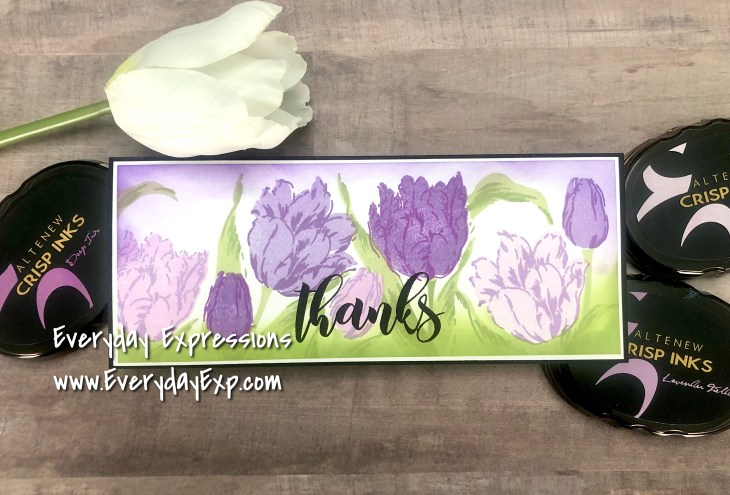
Card #2 Technique:
The second card was more technically challenging, and we used stamping platforms, such as a MISTI, for this project. We used all three stamp layers for the layers, and followed the stamping guide for alignment hints. Once again, we used Altenew ink sets, and added another choice analogous color for added interest and deeper shading. Everyone loved the effect of adding this extra color!

Tips:
- If your layers don’t align perfectly, it only adds to the artistic interest!
- If you are intimidated by stamping layers, begin simply and only use two stamp layers at first.
- Follow the included stamp layering guide!
- Stencil/masks take your card-making to the next level, and make stamping so much easier than fussy cutting your own masks.
- Use a Zig Blender Pen or Artist Markers to fill in white space from ink mistakes or misalignment.
- Obsidian Pigment Ink stamps beautiful sentiments every single time!
- Use a stamping platform to help align stamp layers.
Tricks:
- Select an analogous color to your four ink color set for added depth and interest in shading! Here’s how you do it: Stamp the solid image. Then select a darker ink color, and stamp the second floral layer. Next, gently tap the analogous ink around the outer edges and on the bottom of the shaded detail. Soften the hard edges with a finger dauber, and stamp. If you want to deepen the color, repeat this step. Finally, stamp the last layer. So pretty!! (Roseann used blues and purples for this, and it was gorgeous!)
- Although Altenew masks are thinner than regular stencils, it can still be difficult to ink stamp right next to the masked image. Off-set the mask about 1/8″ into the previously stamped image to give extra space for the second image. Does that make sense?
- Add interest to cards by ink blending around the edges, or mask flowers and blend ink in the background. Also you can splatter with shimmer sprays for an artistic flair!


So what do you think? You can see all of the participants and more pictures in my previous post HERE. I think everyone had fun, and hopefully learned a couple of things too. If you haven’t applied to the Altenew Educator Certification Program, I can’t say enough to encourage you to try! Love and artsy hugs!
Erin
Altenew Products Used:
Exotic Tulips Dies (Sold Out)
Obsidian Pigment Ink (Sold Out)
In case the Exotic Tulips Stamps are sold out, here is the Build-a-flower Triumph Tulip

You really have done an excellent job in this workshop, Erin! The stamp-layering class provided a very comprehensive guidelines to Altenew’s color-layering stamps. It was so ENJOYABLE to see you teach and demonstrate your knowledge and skills. Your share of tips and techniques are spot on. Thank you for investing your time and hard work in this program. We are so looking forward to seeing you teaching in your local crafty events on behalf of Altenew. Congratulations on your brilliant work!
LikeLike
Thank you so much, Virginia, for your time, support, and kindness throughout this long journey. I can’t tell you how much it means to me that you stuck with me to the very end (even though I wanted to quit, you encouraged me to keep going). I am so glad that I finally finished and can say that I am a Certified Altenew Educator!
LikeLike
What an awesome post! You did such a fantastic job. You will be an amazing teacher, you ARE an amazing teacher!! It was a treat watching you create and teach. I was admiring the organization and how clean and proper your table looked; it usually is a mess when so many people are involved. But you were a woman with a plan! A good plan! Congratulations Erin! You took your time and you did it exceptionally well! Bravo!
LikeLike