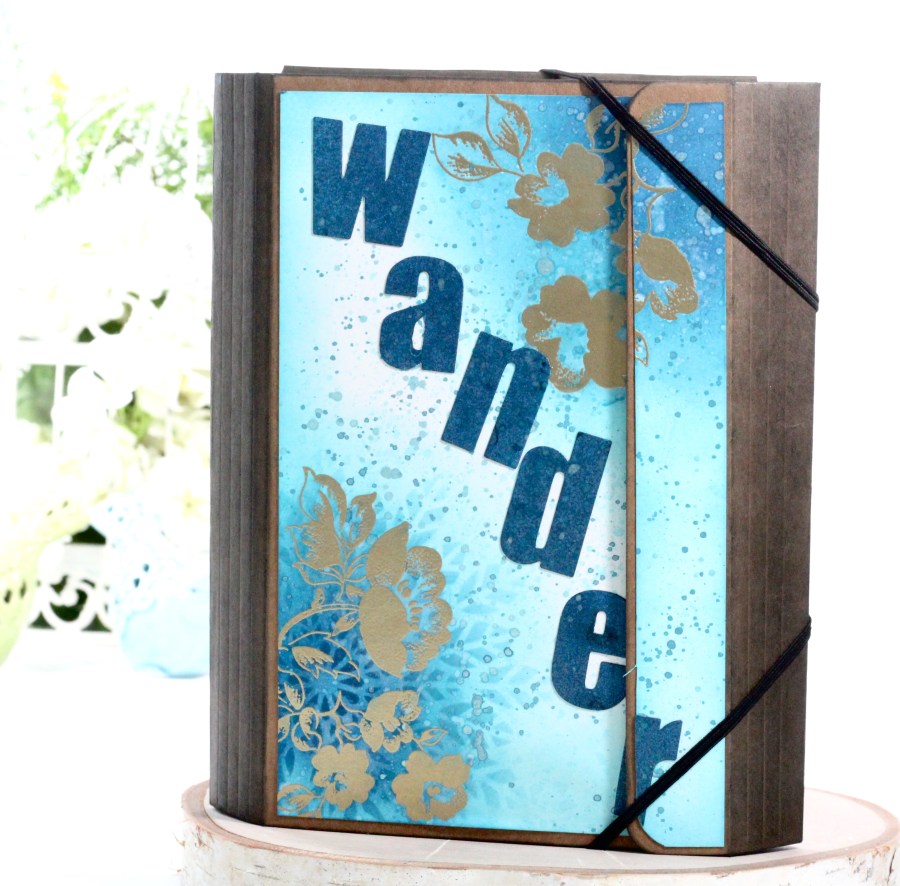
Hi Everyone, and welcome back to my craft room! Today I’m sharing a Travel Journal I created as a challenge project for Level II of the Altenew Educator Certification Program using Tim Holtz’ idea-ology small Collection Folio. I often create my own mini-albums from start to finish, but I thought it would be fun to begin with the “bare bones” already created. This folio is the perfect 7″x9″ size to tuck in a bag when traveling to collect all sorts of photos, tickets, maps, itineraries, etc. as memorabilia.

Technique: Use stamping supplies to create background papers for album pockets, pages, flips, flaps, and tags

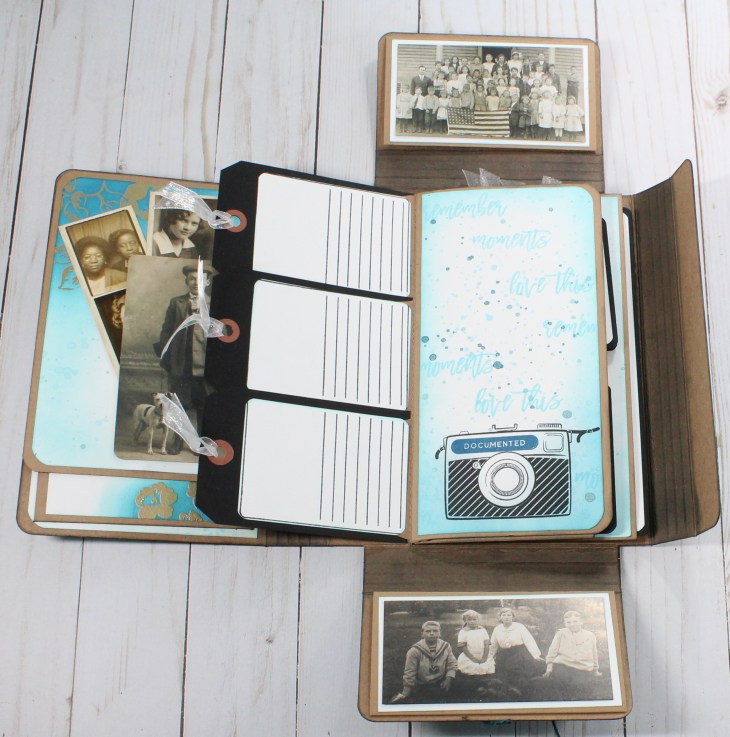
I challenged myself to use basic card-making strategies to create the background papers for this album, and also use mini album crafting techniques to stretch the Collection Folio into a travel journal that could hold 40-50 photos plus memorabilia.

I used Altenew stamps, dies, stencils, inks, embossing powder, and spray inks to create all of the backgrounds.
Tips:
Make albums user-friendly! I like to keep my albums fairly simple with few embellishments. Embellishments add unnecessary bulk, and detract from the user’s own collection of ephemera. Let his/her pictures tell the story!

Use strong adhesive when creating albums. I like to use Scor-Tape.
I use very strong, thin, small magnets hidden under background papers or photo mats to keep flaps closed and everything stays neat and tidy when turning pages.
Finish all pages, papers, photo mats, etc. with ink. I finished the chipboard folio with black soot Distress Ink, and all white cardstock with Ocean Waves Crisp Ink. It creates a polished, professionally finished look to albums.
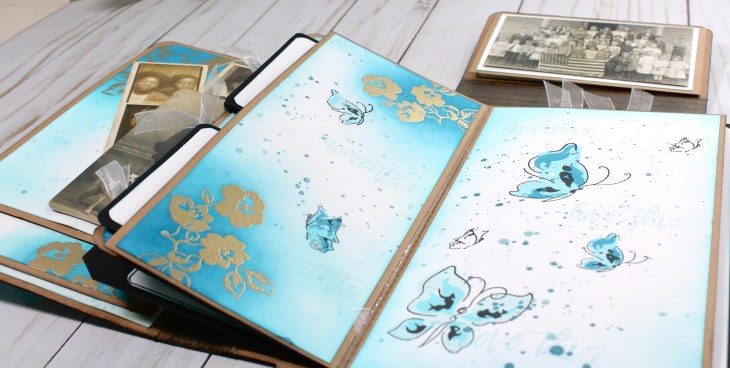
I stencil first, next heat emboss, then blend layers of ink, and finally splatter ink when creating pages. The last step is to take a dry soft cloth or tissue, and gently buff the embossed images to remove excess ink. This process builds the layers of ink for interest and dimension.

Add white, light-weight cardstock as photo mats to create a more polished look to your albums. Also, it shows the recipient (who may not be a scrapbooker) where to place photos.

Trick: Pack as much photo space into small albums as you can by creating flips, flaps, pockets, tags, and photo booklets. It is amazing how many photos you can fit into just a few pages of a mini-album. I would say it’s almost magical!!
Okay, what do you think? I think using the folio helps take some of difficulty out of creating your own mini album or journal. Ready to try your own? Check out my YouTube video for more information. Thanks so much for stopping by today. Love and artsy hugs!
Erin
Products Used:


Erin, how awesome is your Travel Journal video! I love that you stepped up the challenge. It’s so fabulous to see your finished project. You attentions to design and craftsmanship are superb! You aced the Altenew Level 2 final challenge! I am so glad that you enter your beautiful work in Altenew AECP assignment Gallery.
LikeLike