
Hi Everyone and welcome back! Oh my goodness what a crazy week we’ve had in the Thompson household. I told you last week that we were heading to Indianapolis for marching band BOA grand national championships. Well, my son got very sick and ended up in the hospital afterwards. He is feeling much better now (not to worry anybody), AND the band finished seventh in the finals! He’s a tough kid and nothing could keep him down.
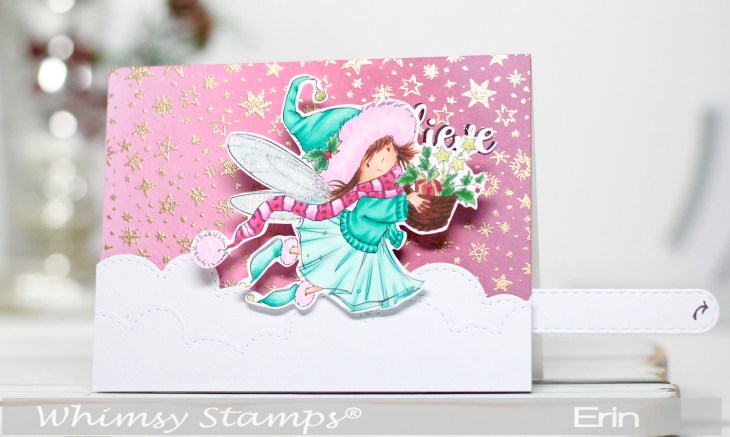
So, this adorable card didn’t get finished in time to be featured on the Whimsy Stamps Blog, but at least I’ve got it for you here today. Isn’t this sweet Merry Wishes Fairy too cute? I just love all of the Whimsy Fairies! What makes this card even better? It is an interactive slider card using Whimsy Stamps special release of kinetic dies. So she flits through the clouds!
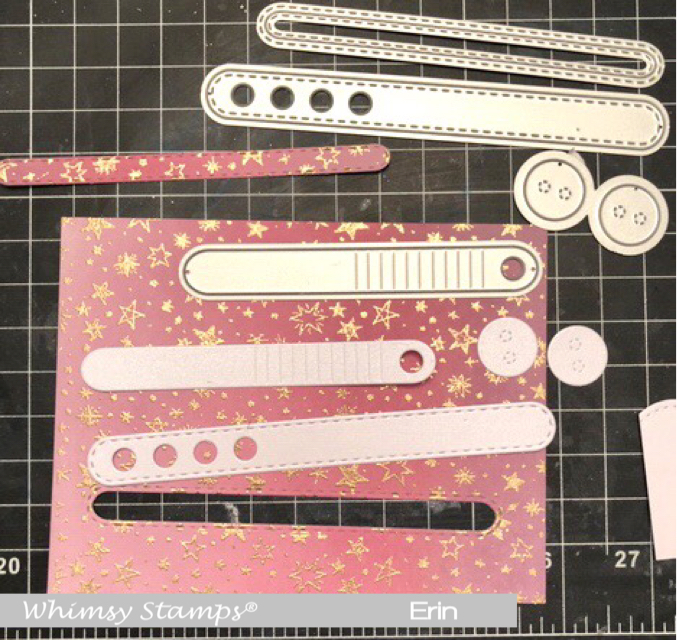
First, I blended milled lavender, spun sugar, picked raspberries, and dusty concord Distress Oxide inks onto Canson watercolor paper. Then I heat embossed the Galaxy Galore background stamped image with Ranger sparkly embossing powder. TIP: Oxide inks are very wet! Make sure that you let the ink dry (or use a heat tool) completely before trying to emboss, or else you will have a mess! Next I die cut all of the pieces for the slider.
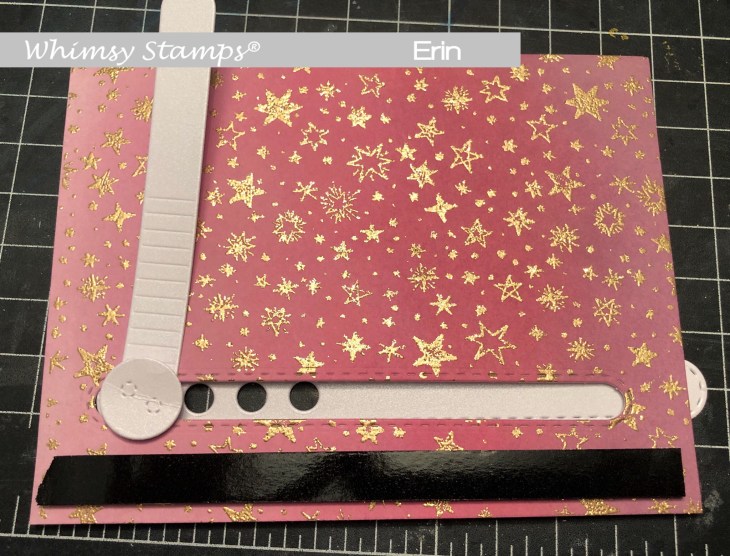
Place one die cut circle behind the slider, and add a foam dot through the slider hole. Place the image attachment (the piece on top of the stamped and inked cardstock) on the foam dot, and attach the top circle over the attachment piece with a drop of glue. Then add a strip of foam tape at the bottom to attach the die cut clouds. (This covers the entire mechanism.)
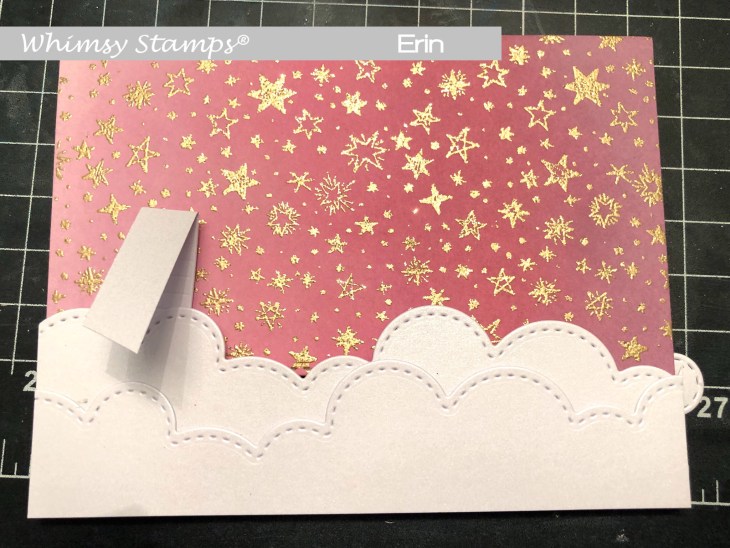
Adhere the die cut clouds over the foam tape, fold down the image attachment, and trim to the correct length so that it won’t show under your moving image.

Flip the front panel over to add foam tape to the back. Add two strips of foam tape on each side of the slider mechanism, and then around the entire panel. Note: I used a craft knife to cut the foam tape backing in order to leave a strip around the slider. Otherwise, it would have stuck and the mechanism would not have moved.
Adhere the panel onto the card base, and add the Copic colored fairy. Finally, I die cut the believe sentiment from white and black cardstock, and adhered them to the background. TIP: The sentiment needed a shadow to stand out on the busy background. However, why didn’t I create a teal cardstock instead of using the black? Duh! I would have liked that better, but didn’t think of it this time.
There you have it! What do you think? I will admit that I was worried and confused at first, but once you begin it is much easier than you think. Love and crafty hugs!
Erin

Whimsy Products Used:
 Merry Wishes Fairy Rubber Stamp
 Galaxy Galore Background Stamp
 Kinetic Straight Basics Die Set


PS – Affiliate links used where applicable. However, I only use products I highly recommend to friends. All ideas and opinions are my own.

This card is amazing and beautiful!
LikeLike
Thank you!!
LikeLike
Oh Erin, this is adorable! I LOVE this fabulous die set. What a sweet image to use this die set with too. Love that! Hugs, Wends xoxo
LikeLike
12/4 What a beautiful card Erin. And you’re the first detailed blog I’ve been able to locate to help me know what to do with my new dies. Thank you for the step by step instructions and photos. Although they still look confusing… I’m going to give it a shot. ~ Pam
LikeLike
Pam, thank you so much for taking the time to leave such a nice comment! Please let me know if you need any help. I can’t wait to see what you create!
LikeLike