
Hi Everyone, and thanks for joining me today! Today’s card is homework for Altenew Academy class, Beautiful Details, taught by one of my favorite artists in the cardmaking world, Marika Rahtu, from Me and Minime Crafting. Marika has inspired me since I first started stamping, and her work is breathtaking. Needless to say, this class was more than a little intimidating for me, because I’m not an artist and don’t usually have the patience for coloring or watercoloring. Honestly, that’s one of the reasons it took so long for me to complete this class. I’ve been practicing and working on many things (and most have gone in the trash) until I’ve finally finished something with which I’m happy.
You can find another sympathy card I created previously with beautiful details as well by clicking HERE.

Technique: Coloring with Copics or Artist Markers for detail and interest
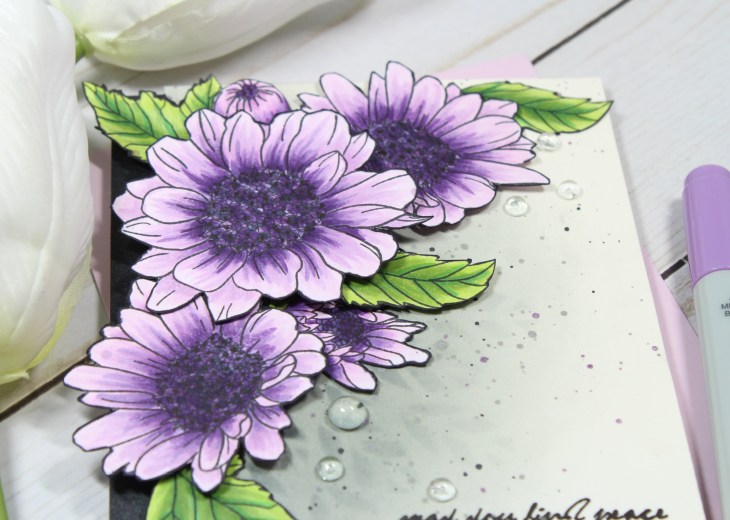
What I truly love about Altenew’s layered floral stamps is that they make me look like an artist (when I’m not!), but I do have to agree with Marika that there is something special when you color with markers, colored pencils, or watercolor. It adds layers of depth and beauty that you can’t get with only stamps. For these Spring Daisies, I stamped the outline in Memento black ink, and blended several layers of purple Copics.

Tips:
Always use an alcohol ink-friendly dye ink for stamping and Copic coloring. My go-to is Memento black.
Layer, layer, layer … and layer some more in your coloring. I use X-Press It cardstock for coloring. Also, place a piece of copy paper under your cardstock to soak up excess ink. I am not an expert, but here’s what works for me: Begin with the lightest color as a base; Then move from darkest to lightest in layers of small flicks. Blend with the lightest color last. Finally, add in darker colors and blend again where needed. Copic flower colors: V17, V15, V12, V00.
The “flicks” of marker add detail and interest. It mimics the colors in flowers and creates an organic beauty.
After fussy or die cutting the flowers and leaves, finish the edges by outlining in a black or dark ink.
Trick
The final details in completing this card is the background. I used Altenew’s new Leaf Burst stencil softly blended with Hickory Smoke and Black Soot Distress Oxide inks. The trick is to blend the stencil inks with more Hickory Smoke before the first layer of ink dries to soften the overall look and give it a somber feel. Finally, splatter it with gray and black inks, and Soft Lilac ink spray. The overall effect is very subtle, but softly detailed.

Thanks so much for stopping by today! What do you think? How do you add beautiful details to your cards? Love and artsy hugs!
Erin
Altenew products used:

This is a beautiful sympathy card. Love the smoky gray background with subtle leaves.
LikeLike
Thank you! The background was my favorite too!!
LikeLike
Thank you! I think you’ll see this style of background again soon;)-
LikeLike
Wow, Erin, your stamping and inking are superb! I love everything about this design! GREAT write-up and details! I am so glad that you enter your beautiful work in Altenew AECP assignment Gallery. Super work!
LikeLike
Thank you, Virginia, for such kind comments!
LikeLike