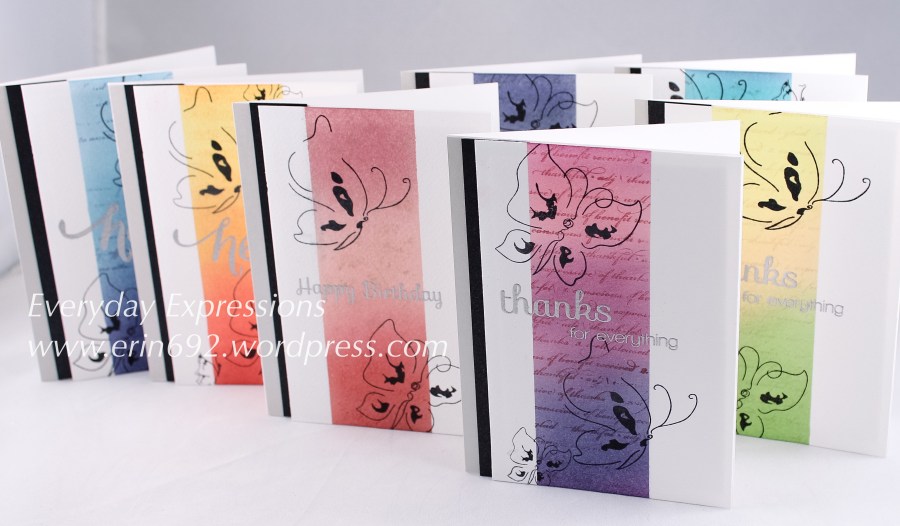

Hi Everyone! As you know from an earlier post, I created three sets of cards as gifts for a Christmas exchange, and this is the second design I’m sharing. I knew that I had to keep it somewhat simple with only one or two layers. Also, I had it in my head that I wanted to do something with Distress Inks. I found a pin from Gentleman Crafter and liked the style, and that became my inspiration for this set. Finally, I decided that using Altenew Painted Butterfly stamps would maintain continuity through basic layout. I think I will also post this on the gallery for the Altenew Clean and Simple Boutique Cards class in which I’m currently enrolled. What do you think? I’m very pleased with this set. Who doesn’t love butterflies and stationary?
First and foremost, I’ve finally solved my distressing dilemma of streaking and striping of inks! I figured out that the inks work best on watercolor paper. I knew that Distress Inks are water-based and work best on watercolor paper when saturating with water, but I didn’t realize that using watercolor paper made such a difference for blending. After using several pieces of Ranger watercolor cardstock to experiment (and loving the blending results), I thought I would try other kinds of watercolor paper from the craft store to see if the results were just as good. I purchased Canson 90 lb. and 140 lb. 9″ x 12″ pads. I used the 90 lb. paper for this project, and I love the results! It was smoother and lighter weight than the heavier cardstock I’d been using. However, the distress inks blended easily with none of the problems I’ve had previously using Neenah cardstock. The only problem I have is that the Canson and Strathmore papers have an ivory tint to them. The Ranger is whiter, but a much heavier weight. Going forward, though, I will only use watercolor paper with Distress Inks. The results are fabulous with no more headaches! Yay!
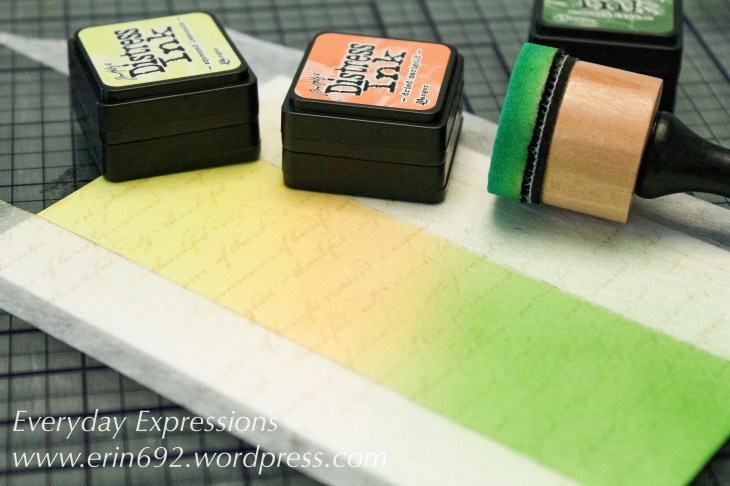
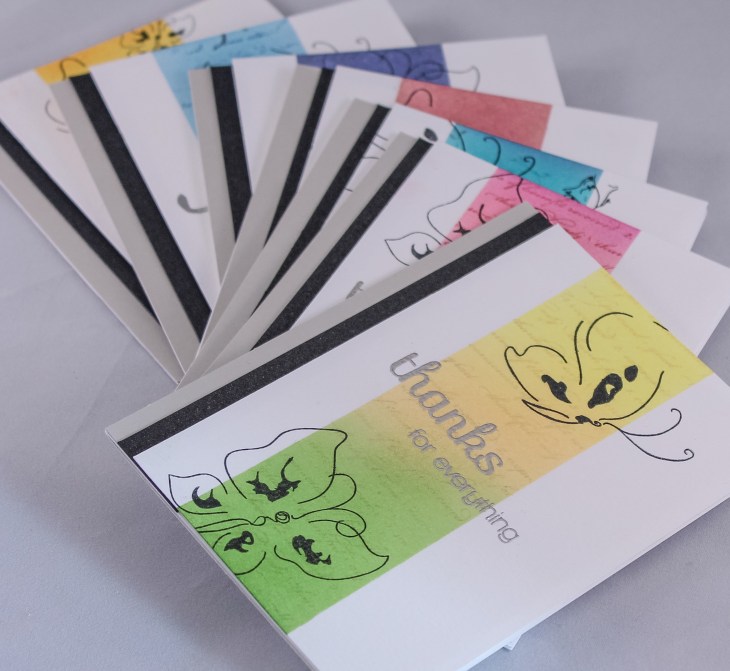
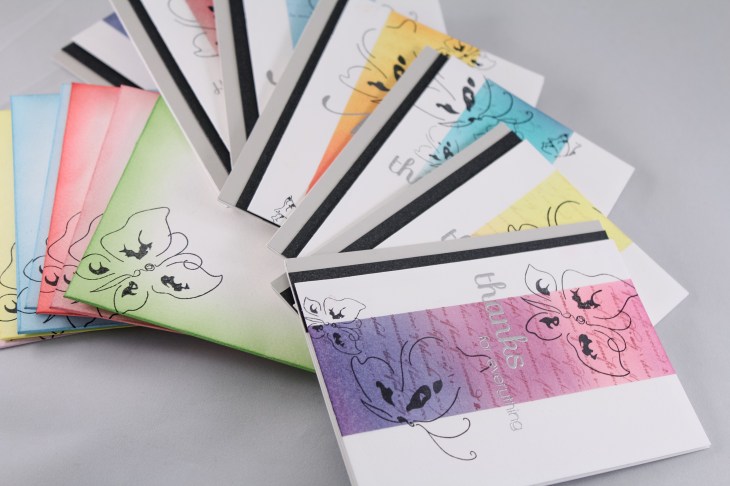
I cut seven 5.5″ x 3.75″ cards from the 90 lb. watercolor paper. Then I used a T-square to lightly pencil a 1.5″ area .75″ from the side, and taped the outside area off with 3M tape. I used three Distress Ink colors to blend. IMPORTANT TIP: Use the heat gun to dry Distress Inks between each layer or else they will smear. Distress Inks are water-based (and that’s why they do so many great things), but they stay “wet” for a while.
I used a very light ink color to stamp a background. I used WPlus9 Defining Words for many of the cards, but I also used a Heidi Swap stamp block (I can’t find the name anywhere on the packaging) on a couple. Next I pulled the tape off, erased the pencil lines, and stamped Altenew Painted Butterflies. The embossed silver sentiments are from Simon Says Stamp Thanks and Birthday Messages and Wplus9 Hand Lettered Hello. Finally, the border is Crafter’s Companion Shimmering Cardstock in black and silver, and I used foam panels behind the watercolor card for dimension.
I purchased the We R Memory Keepers Envelope Punch Board, and I was so excited to use it for the first time. I used the 90 lb. watercolor paper to cut and fold A2 envelopes, and then colored with Distress Inks and stamped to match the cards. The final gift touch was to create a panel for the set box and add a lovely green bow.

There you have it! Card set number two with Distress Inks and Altenew stamps. So? What do you think? Thanks everyone for stopping by!
Love and crafty hugs!
Erin

These are so beautiful!!
LikeLike